Showing posts with label recipes. Show all posts

Wednesday, October 10, 2012

Homemade Butter

When I was young,my Dad was diagnosed with high cholesterol,so into the house came margarine and Egg Beaters. That's what I grew up with. When I moved out,I went back to eggs but stuck with margarine,at least,until a few years ago. The more I thought about it,the more I realized that all margarine consisted of,basically,was congealed oil. How that could be better than  butter, I couldn't fathom. Cream is natural from milk,and shaken cream makes butter. Margarine is a whole process which doesn't sound very appetizing to me ( Google it!).

At any rate,I have been wanting to try make my own butter for a while. Do I need whole cream straight from the cow? Can I use whipping cream from the store? I checked various websites and blogs,and it seemed there were many opinions on this subject. I finally said "I'm going for it,"and tried it out----only half an hour ago,to be precise!

Let me say this:making butter is very easy. If you can pour cream into a mixer bowl and turn the mixer on,and if you can squeeze buttermilk out of butter,you can make homemade butter.

Here is what I did:

I took My Precious (my Cuisinart) out from the cabinet. The poor thing hasn't seen too much action of late,so I was glad to get her going again. Brother B did the grocery shopping yesterday,and he picked up 2 pints of  Stonyfield Organic Heavy Whipping Cream,which was ultra pasteurized. 


I poured them right into the mixing bowl-I didn't wait until they were room temperature. I did nothing fancy to the mixing bowl. ( I had read somewhere that the bowl had to be chilled and the cream brought to room temperature). I put the whisk attachment on My Precious,and she was ready for action!


Oh,yes,this is a VERY IMPORTANT part-PUT THE SPLASH GUARD ON!! Trust me on this. I read warnings about splashing. I was expecting splatter. Splatter does not do it justice. You'll see!


I started on a lower speed for a couple of minutes. The cream became a bit frothy and started to thicken a tad.

I then put the speed on high and after a bit I started getting peaks-it was turning into whipped cream. Keep going........


It's thickening up nicely,isn't it? It's not butter yet,though. It's still too white. There's also no buttermilk separation yet.


Keep whipping. See how the color is turning to yellow?

It's looking more like butter,but it still needs a couple more minutes. Once the butter is done,the butter milk will separate from the butter,and it will SPLASH. I'm talking mixer tidal wave-no joke! I should've covered up the pouring hole  in the splash guard. The buttermilk made a mess. I can't imagine not having something over the bowl when the tidal wave occurs-seriously,use something...even if it's just plastic wrap. I had to jump back and quickly shut off the mixer because the buttermilk was flying everywhere.

Another sign it's done-the butter will clump onto your whisk attachment in one big ball. See all the buttermilk at the bottom of the bowl?

Since I don't use buttermilk,I had no need to keep it for anything. I did make a ball out of the butter and squeezed it until most of the buttermilk was gone. I ran the ball under cold water and squeezed the water out a few times until the water was clear. I admit,it's a bit of a pain. If you have butter paddles,or even just used a sturdy spatula and press the butter against the side of the bowl,that would probably be a bit easier. I tried the hand method to see how it would work . I also put some salt in the butter and kneaded it in. How much salt,or whether or not to add it is up to you and your taste.

This is a good time to bring out my antique butter dish that my Aunt Jeannette had. It makes for good storage in the fridge.


How can you not try homemade butter right away? I put some bread in the toaster and waited with buttered breath!!!


It looks like butter,it spreads like butter......

This gal needs butter spread end to end on bread. Rick always teases me about it. If you're going to butter bread,then I say,butter it,damn it!!  :)

Not only does it look like butter and spreads like butter...it tastes like butter! Yummy!! I scoffed down the toast after I took the photo.

You can, of course, make all kinds of homemade butter-apple butter,pumpkin butter,garlic butter,honey butter.....the world is full of homemade buttery goodness-right at your fingertips! 

Have a fabulous day on this Fabulous Planet!!!!


Sunday, August 5, 2012

Homemade Ginger Ale

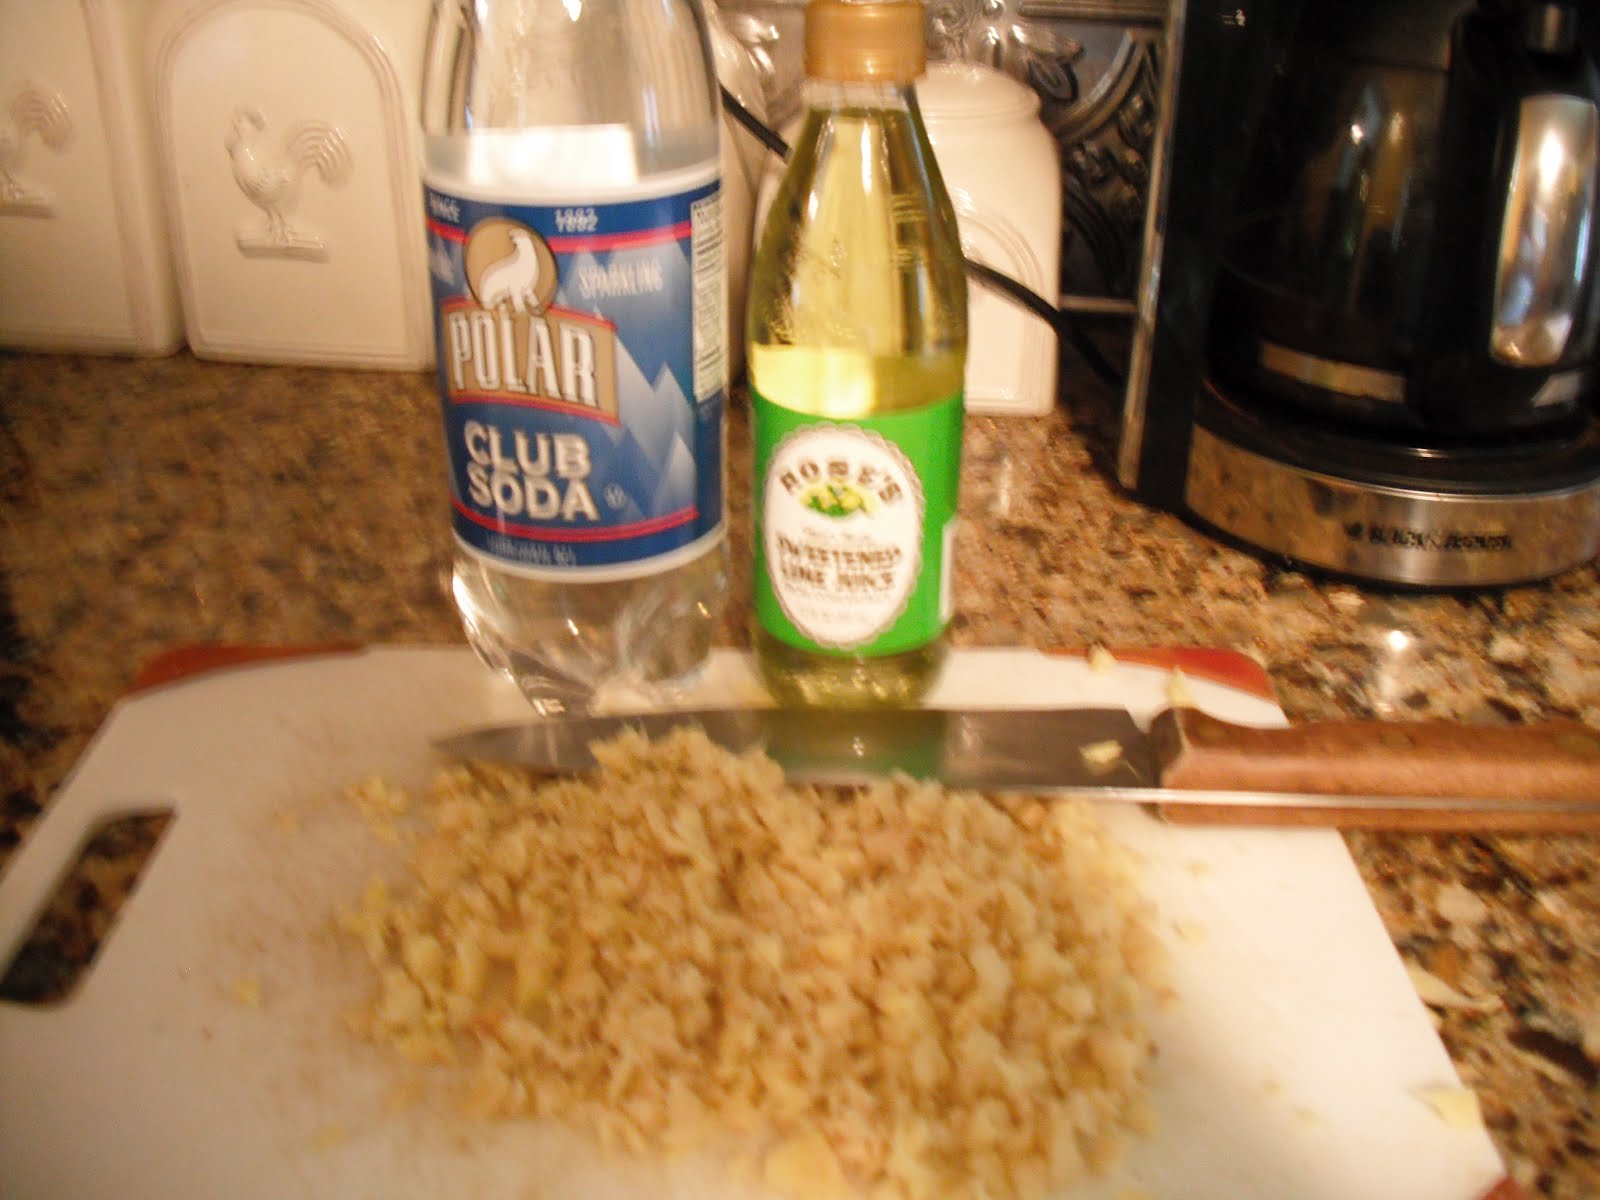
Ginger ale is a great drink. It's good ice cold on a hot day,and when you are not feeling up to par,ginger ale is great at helping settle an unsettled stomach. Making it is very easy,and you can change the portions to suit your taste. This recipe makes for a smooth ginger ale,and it is quite yummy! (Smelling the fresh ginger as you chop it is fabulous as well!)

Recipe is from Simply Recipes (www.simplyrecipes.com).I don't have the patience to try and come up with my own recipes!


Ingredients:
To make "ginger water"
1 cup peeled,finely chopped ginger
2 cups water

Simple Syrup:
1 cup sugar
1 cup water

club soda
lime juice ( I used sweetened)
lime wedges (optional)

1)Bring 2 cups of water to boil in saucepan and add ginger.Reduce heat to medium low and simmer for 5 minutes. Remove from heat and let sit for 20 minutes.Strain liquid through a fine mesh strainer and discard ginger pieces.

2)To make the simple syrup,boil 1 cup of water,then add 1 cup of sugar and stir to dissolve. Set aside.

3)Make individual servings of ginger ale by mixing 1/2 cup of ginger water,1/3 cup of simple syrup,and 1/2 cup of club soda. Add a few drops of lime juice.Put a lime slice in drink (optional).

Makes four servings


I mixed everything up in a pitcher. You can double or triple the recipe,depending on how much you want,of course. Add more soda water,lime,or completely disregard the lime,it's up to you!

Enjoy!


Wednesday, December 28, 2011

Stuffed Mushrooms

I got this recipe off the internet from "Annie's Eats."


                                                  Stuffed Mushrooms

24 whole fresh button mushrooms
2-4 cloves garlic,coarsely chopped
2 tsp.vegetable oil
8 oz cream cheese,softened
1/4 cup grated Parmesan cheese
1/4 tsp.pepper
1/4 tsp.onion powder
1/4 tsp.cayenne pepper
Bread crumbs and minced fresh herbs,for garnish (optional)


Preheat oven to 350. Lightly grease a baking sheet with cooking spray. Clean mushrooms with a damp paper towel.Carefully remove the stems from the mushroom caps,setting the caps aside for later.Add the stems to the bowl of a food processor.Add the garlic to the food processor as well,and pulse in brief bursts until the mushroom stems and garlic are finely chopped.

Heat the oil in a large skillet over medium heat.Add the chopped mushroom stems and garlic and cook until all the moisture has disappeared,about  5-7 minutes.Lower the heat to medium-low.Stir in the cream cheese,Parmesan cheese and spices.Stir together until the mixture is smooth and creamy;remove from the heat.Using a small spoon,fill each mushroom cap with a generous amount of filling.Arrange the mushroom caps on the prepared baking sheet. Top with bread crumbs,if desired.Bake for 20 minutes or until the mushrooms are hot and liquid starts to from under the caps.Transfer to a serving platter,garnish with fresh herbs if using ans serve immediately.

I pre made the mushrooms,and kept them the fridge until it was time to cook them,and it worked fine. The come out very light,with just a slight kick of cayenne at the end. Everyone loved them-there were none left!

Enjoy!!!

Wednesday, November 23, 2011

Making Pumpkin Puree

Last year was my first year at making homemade pumpkin pie,by which I mean making the pie with pumpkin grown here and not from a can. :)

Pumpkin puree is pretty easy,though it can take a while to make,depending on how many pumpkins you are trying to process at once. I had two Sugar Pumpkins.

1) Wash the pumpkins.Cut the pumpkin into quarters. If you cannot do this yourself(like me) you can enlist the help of a strong man (like me).Then,cut the quarters in half so the sections are smaller.

2)Scoop out the seeds and guts.

3)Fill a microwaveable bowl with about 2" of water,and place as many pumpkin slices as will fit into the bowl.The less you fill it,the quicker the pieces will soften up.


4)Cover the bowl,and put in the microwave on high for about 20 minutes or so.The rind should come off fairly easily. I peeled it off ,or you can use a fork to scrape the flesh away from the rind. Cut the pieces up so they will fit into a food processor.


My food processor suggested level 10,and in no time it was a puree.

It took me about an hour and half to nuke,peel,and puree all the pumpkin pieces I had. As each batch was pureeing,I would weigh out 15 oz batches,since 15 oz is the standard pumpkin pie can size. In all,I made 5 batches,each in their own freezer bag,which I immediately put in the freezer for future use.

Enjoy!

Tuesday, November 22, 2011

Super Easy Venison Sausage

Right now the Menfolk are in the middle of the turkey fest. Zach did the dirty deed ("Mumma,you are going to have to use Oxyclean on my clothes,I hit the jugular.")Two are hanging out back,and Rick is plucking one in the garage. I braved the masses and went grocery shopping today,thankfully I went a bit earlier than  normal so it wasn't so bad.I got a few small things ready today-cooked my cranberries for the stuffing (actually dressing,but we always call it stuffing),made my cream cheese/olive filling for celery sticks,and made my venison sausage.This was my first attempt at venison sausage,and I must say it came out AWESOME. It's very easy. I got the recipe from Cooks.com.

                                                    Deer Breakfast Sausage
1 lb ground venison (no suet)
1 lb ground pork
2 tsp ground sage
1 tsp salt
1 tsp black pepper
1/2 tsp cayenne pepper

Put venison and pork in a large bowl. Mix the spices together and pour sprinkle over meat. Using your hands,work the meat and spices together until thoroughly combined.Shape into roll,wrap in plastic or foil,and chill overnight in the fridge.Slice and fry as regular sausage.

The only thing I did not do was make the meat into a roll. I cooked some up right away and brought it outside so the Menfolk and The Boy could try it,and they all loved it.Our neighbor,Kelly,was chatting with Brother B,and he loved it as well.He told me to give his wife the recipe. I put the pound of sausage I need for the stuffing in the freezer in a separate freezer bag,and froze the rest together.I wasn't sure how long fresh venison lasts in the fridge,since it had been in our fridge since Saturday. I figured an overnight freeze wouldn't hurt,and tomorrow I will cook up what I need for the stuffing so it will be all set for Thanksgiving.

Tomorrow I will make pumpkin pie with homemade pumpkin puree,iron the tablecloth,wash the glasses and china,dry out the Gluten Free bread for the stuffing,and fill the celery sticks with the cream cheese and olive mixture. Less things to do on Thanksgiving!

Have a lovely day!!!

Friday, October 21, 2011

Garlic and Onions Learning Curve

Today is overcast and chilly,the kind of Fall day when one looks at the gray clouds and thinks,"Hmm...looks like rain or snow flurries." You know it's not quite cold enough for snow,but man..those clouds make you think it.

Today was garlic planting day. This is our first attempt at garlic. We have been given bulbs in the past to plant. We have never actually done it,but we have enjoyed them in our meals! This year,our neighbor gave us quite a few bulbs and cloves,and I was determined that I was going to plant at least some of them. I decided to plant about 10 cloves in a couple of places. I have an eco box that I planted 5 in after I moved it a nice sunny spot.

One does not plant the whole bulb,but plants the separate cloves that form the bulb.The pointy side of the clove must be facing up,though this photo doesn't show it..

Since we live in zone 5A,we have to plant the cloves at least 3"-5" into the soil,and if you are making rows,they need to be about 18" apart.I only planted a single row.I then planted 5 more in the box I had the beets and peas in. I need to water them for the next three days,and will have to cover them with mulch before too long.We haven't had a frost yet here,which is amazing!We usually have had one by now,though other parts of the state have seen one.

The next thing I did was clean out my onion bed.I left my onions right where they were,in the soil,even after their stalks had dried up and turned brown. Some of the onions didn't reach this stage,so I think my thought process was just to leave everything be until they all were ready. That was my bad,because some of the onions started to regrow green stalks! I wound up having some that were not good-if I could smush the onion in between my fingers,forget it. My red onions turned out to be much hardier than the white ones. I placed them on our drying screen/compost sifter,and put this in our mudroom.Now it smells like "Eau de Onion" out there!

One thing I did learn was that I need to space my onions more,or build a bigger box for them. Most of the onions came out rather small,but they are still good!

Tonight we are having spaghetti and homemade sauce,which hopefully will come out fabulous with homegrown ingredients (tomatoes,herbs).I am going to make enough so I can freeze some for future spaghetti nights. Last night we enjoyed homemade crock pot chili,gluten free cornbread,and homemade chocolate fudge for dessert. Rick took one bite of the chili,and said,"You have done me proud yet again,Woman." :)

Our AC's have finally been taken out of the windows....our list is getting smaller and smaller....finally!

Wednesday, June 22, 2011

Summertime Is Here

I have been trying for several days to answer comments on my posts,but Blogger will not let me. I can't respond to posts on other blogs,either! I have tried resetting my password,but I keep coming up as anonymous,and then it goes right back to the password page. Go figure!

Things have been busy around here. Our garden is growing well,which I am happy to see since we had such a late start. I have two ripe strawberries,and I still need to trellis my peas and cukes. I did get my tomatoes staked. I will post pics of that tomorrow.

The boys have been working on levelling the yard and creating a swale in the back so the water doesn't drain from our next door neighbors yard through our garden area ,into the chicken pen and hopefully not in our basement so much. Today they are going to work on levelling the area for our set -it -up-yourself pool. Our grass seed is finally sprouting as well.

Yesterday we had an exciting morning. Rick and Brother B were on their way to go fishing when Rick almost stepped on a little kitten. It ran under our porch,but they were able to get to it:

We thought perhaps the neighbors cat had babies,but when we asked them about it,they said no. Apparently,though,they have seen kittens running around in the area,so a cat had a litter somewhere nearby. This poor little one is just a baby. It was very scared,and bit both Rick and I,but after a short while it calmed down and we were able to hold it. It's little spine is sticking out,so we gave it some soft food and tried to get it to drink a bit of milk. I have named it Smokey. I believe it's a male.He tried to snuggle with Moxie but neither Moxie or Little O were having any of it,at least,not yet.

I decided to try and make peppermint soap the other day. It's been curing now for about 5 days.I used the lye soap recipe and just added some finely chopped fresh mint when it was starting to trace. I  put in what I felt looked nice. We should be able to give it a whirl in a few days and see how it came out.It looks pink in the photo,but it's not. It's natural color:


When Zach got home from school yesterday he was very surprised to see little Smokey. He has such a soft heart for cats and dogs.Smokey is licking his face in this picture,tickling him and he couldn't stop laughing:


One of the other things I decided to try was homemade ice cream. We love ice cream,but usually have to watch the ingredients because of Rick.This way,we can make ice cream that everyone can enjoy. I bought an inexpensive electric ice cream maker and tried chocolate chip.It came out wonderful! Now I must go buy ingredients for chocolate today:
Today is Zach's last day of school. We went there this AM for the awards assembly. Zach was on 4th quarter Honor Roll,and made Honors All Year.Here he is this morning with his certificates and his autograph shirt:

He has had such a great year this year. Yesterday he won the 7th grade Poetry Slam. Earlier this year he won the 7th grade spelling bee. We are so proud of him!

Summertime is here,and we are ready for it!!!


Monday, April 11, 2011

Homemade Mayonnaise

Today I wanted to try something new. Since we are out of mayonnaise,I decided to give it whirl and make some of my own.
I am not the biggest fan of mayo. I personally only use it when I make tuna fish,or salads such as macaroni or potato. That's it. I still wanted to give it a shot.
My Mom called to chat this AM and when I told her that I was going to make my own mayo,she exclaimed ," Memere used to make her own mayonnaise!" (that's my grandmother). She then told me about all the different things that my Memere used to make,and finished by proclaiming,"That's a lot of work." That's usually what she says to me when I inform her of something new we are trying.
I was not put off,however. After I got off the phone,I went online and looked up various recipes. I settled on a variation of one by Chef Gordon Ramsey.

                                                 Homemade Mayonnaise

3 egg yolks
1 teaspoon of Dijon Mustard (he called for English Mustard,Dijon is similar. I had to look it up)
1 1/2 cups of canola oil
salt to taste
pepper to taste
lemon juice from half a lemon

Makes about three cups of mayonnaise

Mix egg yolks and Dijon Mustard in a food processor. I set mine on 3 and mixed it well.


Keeping the processor going,slooooowly pour in oil. I poured in a little a time,pausing between each addition of oil. Then when the mixture started to thicken up,I kept the slow steady stream of oil going until all the oil was mixed in with the egg/mustard. It will take a couple of minutes. Stop the processor,and add salt and pepper to taste,as well as the juice from half a lemon. Give the processor a nice little blast of power,and it's done.

When I first tasted it,it seemed a bit bland,so I added a bit more salt. This is something that one has to adjust to taste. Some folks use light olive oil,but the mayo will pick up the taste of the olive oil. Some folks use grapeseed oil. It's all up to what you like or want to experient with.
The mayo will be yellow because there are no egg whites,and in the photo you can see the dark bits from the Dijon Mustard. It tastes lighter than regular mayo. So far I have as yet to try it out on anything,but  I thought the taste was good. It keeps for up to 5 days,so you will want to remember what day you made it on. Don't go any longer than 5 days!

Sunday, November 28, 2010

Doris' Apple Stuffing

One of the staples of Thanksgiving growing up was my Mom's apple stuffing. I don't know where she got the recipe-I never thought to ask,believe it or not. It is a tradition I follow,like making touques (pronounced "took-kays"...which in English is Pork Pie) on Christmas Eve.( I probably spelled touque wrong,since I am not very proficient at French)

This year like I previously posted, I decided to make it with gluten free bread so my hubby could enjoy it. It still tasted the same,so going forward it will be made gluten free.

Here is the recipe...I don't think my Mom would mind my sharing it. It's delicious.( I think Almanzo Wilder would have loved it,considering his affection for apples and onions)

Doris' Apple Stuffing

1/4 cup butter or margarine
1/2 cup chopped onions
1/2 cup chopped celery
4 cups diced tart apples ( I used Granny Smith)
1 tsp salt
1/3 cup sugar
4 cups small bread cubes*

Melt butter in a large frying pan. Add onions,celery and apples. Sprinkle with salt and sugar. Cook until soft,then add the bread cubes and mix. Heat through.

* You can use bread stuffing. I used gluten free bread from a mix,and toasted enough slices to make 4 cups. I added no other spices and it came out great! I made it early in the day,and just microwaved it to heat it back up when it was dinner time.

Wednesday, October 13, 2010

Crock Pot Chili

Today I am making crock pot chili. It's the time of year for hearty,stick-your-bones fare.The weather is cool out,and nothing says Fall like a nice bowl of steaming chili on a chilly night. Right now my pinto beans are on the stove,boiling until they soften up.

Here the last harvest of the season.I picked all this on Saturday before I pulled the plants. I went through the tomatoes today to see which ones I could use for the chili. I think we will make some fried green tomatoes with some of the ones which are not ripe yet.I will use the green peppers in the chili as well.

I have started to decorate the front yard with my corn stalks and pumpkins. The only thing I bought was mums. You can't tell in this photo,but there is a pumpkin on each side of the steps and a mum hanging on either side of the door. I do need to buy some spider webs and put my big old spider out.
Crock pot chili is incredibly easy. Here is the recipe I use:
1/4 lb pinto beans
(2) 14 1/2 oz cans tomatoes ( I use fresh tomatoes)
2 lbs ground beef,browned and drained ( you could use ground turkey as well)
1 green pepper,chopped
1 onion,chopped
2 cloves garlic,minced
2-3 tbs chili powder
1 tsp pepper
1 tsp cumin
1 tsp salt
Completely soften beans by cooking in boiling water on the stove. Drain the water off the beans and put all ingredients in the crock pot in the order listed and stir. Cover cook on Low for 10-12 hours,or High for 5-6. Top servings with shredded cheese or sour cream if desired.
The first time I made this chili,I had bought chili powder from a local Asian market.I used 3 tablespoons,as the recipe called for, and it was HOT!!!! We could barely eat it. I now use 1- 1/2 tablespoons of chili. We serve it with shredded Cheddar or Montery Jack cheese and sour cream on top.Corn bread is a great side,and I have also used the chili as a dip with tortilla chips,or crushed the chips and mixed them in the chili. Whatever your heart desires!


Friday, October 1, 2010

When It Rains,It Pours

Didn't I say in my last post that it was rainy and raw? Well,the raw didn't last and turned into humidity. It has been rainy and humid here the last couple of days,and right now we are on the tail end of a tropical depression that inched it's way up the eastern seaboard.There are flood watches,though mostly in the western part of the state.Tomorrow is suppose to be a much better day,sunny,and cooler.Right now it is down pouring. I love to hear the rain,though.Especially when I am trying to sleep and I can hear it on the roof. Very soothing.

We have been gearing up for winter,working down our list. Wednesday we had our oil tank topped off. Yesterday we had our septic tank pumped out. Then,our well water finally went below the suction level,so we weren't getting any water. This summer has been very dry,and our well was getting low to start with ( we have a dug well). We don't know if the spring that flows to the well has gotten smaller,or if a rock settled in it somewhere blocking the flow,but our well has been getting lower and lower for the last three years. We are not the only ones who have been seeing lower water levels. Happily,our neighbor Darlene had used a company who fills pools,wells,etc,and she gave us their number. He was at the house within 6 hours,and filled our well up. So we now have plenty of wood for three years,a full oil tank,an empty septic,and a full well.

I made pumpkin puree on Wednesday. It was much easier than I thought it would be. I used two Sugar pumpkins (but one at a time). I cut it in half,cleaned out the seeds and stringy goop,then cut it into quarters. I placed the quarters in a microwave dish,with a couple inches of water. I put the lid on the dish,and cooked it for 15 minutes on high. I then cooked it for 10 minutes on high,and the pieces were soft enough to poke with a fork.The rind came off easily,and I attempted to puree it in my blender. I should have known better.That blender never worked well (it was free) and even though the blade spun,it would do nothing (I had a flash back to trying to make icy drinks in vain). I threw it out. I have only used the blender twice in the last 5 years,so spending money to have it fixed wasn't something that popped into my head. A food processor might be a more worthy investment. I used my hand mixer and it worked well. I measured out 1 3/4 cups of puree for each freezer bag ( 1 3/4 cups is roughly 15 oz,the size of a can of pumpkin).Now I have two freezer bags ready for use. The first batch wasn't watery,but the second one was,so I pressed the puree down with my hands,pushing out the water ,and poured the excess down the drain.

Yesterday I began organizing my closet,and finally decided to get rid of clothes that I have been hanging on to in the hope that they will someday fit,clothes that are stained,or clothes that aren't comfortable but bought because I needed something for an occasion. They are piled up in a box,and I am going to bring them to the local CAP office. Now if I can just get Rick to do the same...... :) I do need to go through my genealogy papers,and this winter I am going to finally get all that information onto my family tree maker program. I also need to go through our file cabinet and see how I can improve upon the files. We have mulitple copies of things,because the military would always lose documents.However,we have a copy machine and we really don't need to keep 10 copies of Rick's Purple Heart orders on hand,for instance. We can use any unneeded papers for fire starter,or for scrap paper. Whichever comes first. Again,that will be a winter project.

Right now I am in the process of making gluten free pie crust for an apple pie. The crust has to chill for an hour. While that is going on,I am washing Zach's bedding,then I should do some ironing.One load is in the dryer,the other in the washer.Rick will probably have to roll out the crust,though.Rolling crust and I don't mix. I wind up trying it several times and he always has to rescue me!He seems to have the magic touch.

Well, I need to go get the apples ready,so I should scoot. Have a great day in your place in the world!

Wednesday, September 15, 2010

Handmade Wheat Bread

One of things that I have wanted to do in my quest to be more "self reliant" is to make my own bread. It took a few years,but I finally did it!

What made me finally decide on making my own bread is unclear. I wanted to to try it for a long time. I think I was intimidated,pure and simple.

I don't have a bread maker,so I went online to find a handmade recipe. I don't want to invest in a bread maker if this is a flash in the pan idea. So I went with handmade. The recipe is found is on allrecipes.com.It was submitted by Nita Crabb. It received 5 out of 5 stars. I hope I am not infringing on any copy laws here.

Simple Whole Wheat Bread
Ingredients:
3 cups warm water ( 110 degrees F/45 degrees C)
2 ( .25 oz) pkgs active dry yeast
1/3 cup honey
5 cups of white bread flour
3 tablespoons butter,melted
1/3 cup honey (yes,another one)
1 tablespoon salt
3 1/2 cups whole wheat flour
2 tablespoons butter,melted

Directions
1.In a large bowl,mix warm water,yeast,and 1/3 cup honey. Add 5 cups white bread flour and stir to combine. Let set for 30 minutes,or until big and bubbly.
2.Mix in 3 tablespoons melted butter,1/3 cup honey,and salt.Stir in 2 cups whole wheat flour.Flour a flat surface and knead with whole wheat flour until not real sticky-just pulling away from the counter but still sticky to touch. This may take an additional 2-4 cups of whole wheat flour.Place in a greased bowl,turning once to coat the surface of the dough.Cover with a dishtowel. Let rise in a warm place until doubled.
3.Punch down,and divide into 3 loaves.Place in greased 9 x 5 loaf pans,and allow to rise until dough has topped the pans by one inch.
Bake at 350 degrees F/175 degrees C for 25-30 minutes, do not over bake. 4.Lightly brush the tops of loaves with 2 tablespoons of melted butter when done to prevent crust from getting hard.Cool completely.


The first thing I had to figure out was step 1. It didn't say to cover the bowl,so I didn't. It didn't seem like much was happening,though the mix did appear to be getting larger,but bubbly? I covered it with a towel,and it did take longer than 30 minutes,maybe closer to 45 minutes. I was expecting big old bubbles like some scientific stew,but it wound up being pinholes-like when one makes pancakes. I assumed that was the bubbles,and went on to step 2.

Since I have never kneaded before,I had to refer to my Red and White Plaid Better Homes and Gardens Cookbook. I sprinkled wheat flour on the dough,folded it in half,then pressed down with the heel of my palm ( do palms have heels?).Folded over,turn,repeat. I even flipped the whole thing over a few times. I may have used 2 cups of wheat flour,but no more than that.
I put a small bowl of warm water on the lowest rack in the oven,then the dough in a big bowl covered with a towel near the top rack. I left enough space so the dough could rise. It took about an hour for the dough to rise. Onto step 3.

OK,so I had to punch the dough down. How did I know when it was ready? it was up pretty high,but was it considered "doubled"? Better Homes said to take two fingers and poke them into the dough about 1/2 ". If your fingers leave an indentation,it's ready to punch down. One doesn't actually haul off and punch the dough,but you take your fist and push it into the dough,which causes the dough to go down. I used my fingers to loosen the dough from the sides of the bowl,which was very easy,then after I took the dough out of the bowl I tore it up into three sections,made those sections into loaf shapes,put them in the pans,and put the pans in the oven.

Step 4-I checked the bread after 25 minutes,and flicked the tops with my finger to see if they sounded hollow. They did,so they were done. They slid out of the pans very easily,and I brushed the melted butter on the tops.

Now comes the important part:taste. How did my first endeavor in bread making come out? Did you really think I could wait until the bread was cooled? What is better than hot bread with butter melting into it? Not much! The loaves sure smelled wonderful.

The taste was marvelous! You have noticeable but not overwhelming honey taste,followed by a subtle nutty wheat taste. Delicious! Add bread to the list of things I will no longer purchase at the store!!!

Tuesday, September 7, 2010

Homemade Brown Sugar

I am not half clever enough to come up with ideas on my own. I get them from blogs,friends,or family.So the day that My Dear Friend Michelle told me she had to make more brown sugar (or was it that she had made more brown sugar?) my ears perked up. "How do you make brown sugar?" I asked,intrigued. "You can make brown sugar?" My Dear Friend assured me that yes,one could make brown sugar,and not only was it easy,it tasted much better than store bought.

Wow. Homemade brown sugar! I don't know where she learned this little bit of homemade goodness-I didn't ask. My head was still reeling. Imagine making your own brown sugar! It was something I never thought of. I figured it was one of those things that you had to buy in the store,sitting for God knows how long in a plastic bag. What a great idea.One less plastic product to buy. And once could either make a batch ahead of time,or make it as needed. I think we have all experienced what happens when a bag of brown sugar is not closed up properly....you wind up with a brown sugar rock-yuck.

So yesterday,since I wasn't feeling the best,and feeling the need to do something constructive, I decided to give brown sugar whirl. It was quick, it was easy,and I will never EVER buy store bought brown sugar again. This beats it hands down. This is what you need:

white sugar
molasses

Yep.That's it.White sugar and molasses. 1 cup of white sugar and two tablespoons of molasses. You put the molasses in the sugar,and mix it up until the molasses is completely combined with the sugar.I used a fork to help things along. I made two cups. The sugar turns a lovely light brown color,just like you would buy in the store.And the taste! Much better,not as sweet. But it tastes just like light brown sugar. I would assume if you wanted dark brown sugar that you would add more molasses,maybe two more tablespoons,or to taste.

How would've thought it would be that easy?

Wednesday, July 14, 2010

Lavender Honey Lemonade

Like I mentioned in a previous post,I made Lavender Honey Lemonade. Like any other recipe that one tries for the first time,I wasn't sure how it was going to taste. It sounded nice and refreshing,but...sometimes the actual product is disappointing.

This is one is a keeper. Though I am not a big lemonade person,I liked it. I don't think you could drink glasses and glasses in one sitting,but it is very refreshing. One glass was enough for me.You can taste all the ingredients. The first taste is of the honey,then you get the tartness of the lemons,then the last taste is the smoothness of the lavender. I let the lavender soak in the honey water for two hours,and I think any longer than that would've brought out the lavender too much,but it is entirely up to individual taste.

If you have lavender,you might want to give this one a try! The recipe is from Mother Earth News. I got it from their website. The author is Deanna Duke.

Lavender Honey Lemonade Recipe
1 cup honey
5 cups water
1 tablespoon dried culinary lavender or 1/4 cup fresh lavender blossoms ( I used fresh)
1 cup fresh-squeezed lemon juice,strained ( it took me 7 lemons)
ice cubes
lavender sprigs for garnish

Combine hone with 2 1/2 cups of water in medium pan.Bring to a boil over medium heat,stirring to dissolve honey. Add the lavender to the honey water,cover,and remove from heat. Let stand at least 20 minutes (and up to several hours-depending how how strong of a lavender taste you want).Strain mixture and discard lavender. Pour infusion into a glass pitcher.( I only had plastic).Add lemon juice and another 2 1/2 cups of cold water.Stir. Refrigerate until ready to use,or pour into tall glasses half filled with ice. Garnish with lavender springs. Makes 6 cups.

Monday, July 12, 2010

We're Having A Heatwave...A Tropical Heatwave....

Today our heatwave and dry spell continues. It's 86 degrees on our screen porch,which is shaded,so that means with the 65% + humidity,it's well over 90 degrees. We are thankful that we have some wonderful trees to help bring a bit of shade if we went outside,but the garden is full blown in the sun until about 4:00 PM.when the sun starts going down behind the pine trees. The chickens have found a nice cool refuge under the coop in the dirt. Right now it's getting dark,and thunderheads are overhead,so we are praying for some rain. We did have some rain on Saturday,but it was a fairly quick,heavy downpour,not what we want or need. We need a nice,leisurely,steady rain,one that lasts for several hours. Our well is the lowest it has ever been,so we have been trying to be more efficient with our water use. My brother Valmore lives in Wisconsin and they are having more rain than they know what to do with,and his garden is being affected by it. I told him he could send a day or two worth here!

Today I am trying a new recipe-Lavender Honey Lemonade. I got it from Mother Earth News. The lavender is soaking in the honey water,and once it's done ( you can let it sit anywhere from 20 minutes to several hours, I am letting mine sit for a couple of hours),you strain it to remove the lavender blossoms,then mix in fresh lemon juice and more water. It should be interesting. I love lavender,but when I handle it my allergies kick in,so I just deal with it. If it comes out well, I will post the recipe,with credit to Mother Earth News,of course!!!

Today I was grocery shopping,and it felt great not to have to buy lettuce,onions,or cucumbers! I literally was grabbing a cuke when I remembered that I now can get them from my garden! After I got home,Zach went out and picked more peas,then he "shucked" them,so tonight we will have our fresh peas with our haddock. How wonderful to step outside the door and pick it when we need it! It's times like this I envy areas that can grow easily year round. We have a small growth window here in NH,unless one has a greenhouse,which I don't,but who knows what the future will hold?

The mail has arrived and my latest copy of The Herb Companion came in.I am still waiting for my Lehman's catalog to arrive,and I just ordered "Radical Homemakers" from Amazon.com.My Dear Friend Michelle is reading it,and she was referred to it by Stephanie,who started our Gardening Roundtable.It sounds like a good read.I will certainly chat about it when I do finish it.

Still waiting for rain....and off to make my lemonade!

Sunday, May 30, 2010

Remembering Those Who Made The Ultimate Sacrifice

Tomorrow is Memorial Day. It's the day when we reflect and thank those who have died for this wonderful country. Without those brave souls,the United States would not exist.

Having had a husband who served,and who came very close more than once to being one of these fallen,Memorial Day is very special for me.

Not only am I thankful for those who died in service,it reminds me of how much more I need to to thankful for. Someone was watching out for Rick. I am convinced of it.

Tomorrow Zach and I are marching with our Boy Scout Troop in the Rochester Memorial Day Parade,and will attend a ceremony at the Commons afterward.Next year Rick should be able to join us. We will lower our flag to half staff,and each of us will reflect on the day in our own,quiet way. We will probably watch the ceremony in Washington,and a few war movies in tribute.

And we will never forget. Without these brave men and woman,who gave their lives for the freedom of their country,there wouldn't BE a country. It's their selfless act that makes our country great. We should never forget it.


Rick wrote this poem.He started it in Iraq and finished it after he was wounded:

A Soldier's Fight
I fight for God and peace,I fight for duty,honor,country.
I fight for my family so my wife will have a husband
So my son will have a father
So my younger brothers will have an older brother
So my father will have an their oldest son
I fight for those who have already fought
Many of them making the ulitimate sacrifice
I fight so others will not have to fight
I fight for those who are unable to fight
But yearn to
I fight for the freedom of those who can fight
But choose not to
I fight for my fellow soliders who stand beside me
In battle
I fight for my own life,knowing all to well
Each fight could be my last

-Spc Richard F Shaw,Jr 2005

Happy Memorial Day!

Wednesday, February 10, 2010

A-Ha!!!

Last week, I watched Oprah's show entitled "Food 101." Some of what they discussed really bothered me. The fact that chickens have been bred so their breast meat is bigget than it used to be surprised me.Is there really a need to morph chickens into these huge breasted birds? Then I started thinking about how portions on just about everything have increased in size. Think about it! If you go out to eat,the portions are gigantic! Do we really need this much food? Half of it goes to waste because the portions are ridiculous. No wonder we are an overweight nation.

I refuse to buy margarine. For years I did,because it was considered healthier than butter. However,when I actually thought about what margarine basically is (whipped vegetable oil,the kind one uses in the bottle)I came to the conclusion that there cannot be much nutritional value in conglealed vegetable oil. So now,we buy regular old butter. If it was good enough for the pioneers,it is good enough for us.

My Dear Friend Michelle has been on the "homemade is better" bandwagon for as long as I have known her,which would be four years.She would tell me about preservatives,and how she didn't want her children eating anymore of it than they had to,so she makes what she can. I heard her message,but for some reason never felt the need to pick up the torch and carry it with her.

Then,my son asked if I would buy Devil Dogs that week and Oprah came on.

A light bulb went off.

I could MAKE Devil Dogs. Well, they wouldn't be Devil Dogs precisely,but couldn't I make devils food cake,cut it in half,and put frosting in between the two layers? Devil Squares! No boxes,no plastic wrappers,no preservatives! And while I was at it,why didn't I just make cookies? Why buy the packaged kind that have addtiives to "maintain freshness?" Not from a mix,either,mine would be HOMEMADE from SCRATCH,baby!!!

My torch has been lit......

So my attempt at Devil Squares,while they did not come out perfectly square,was a good start. The only thing I had to buy was cocoa. I got the Devil's Food cake recipe from the New Better Homes and Gardens cookbook. What I should've done was use 2 8x8 pans-instead I used a not quite 9x 12,which required more baking time,and which made the cake hard to get out of the pan. So even though some edges came off,I was able to slice the cake down the middle lengthwise,and put the homemade confecttioners sugar frosting inbetween the two layers. I cut them up into squares,and they were very good,if I do say so myself.

I explained to Zach that I wanted to make nice,homemade treats,and that I made him my version of Devil Dogs. He tried one,and pronounced it better than a Devil Dog,and that he really appreciated that I made them from scratch "just for him." It made me feel great. They lasted a whole week,whereas the Devil Dogs would've been gone in a couple of days because there aren't many in the package and they aren't very big.

Yesterday I made homemade walnut chocolate chip cookies ( also from Better Homes and Gardens). I have made cookies before from scratch,but for some reason,these were the best I have ever made.Amazing! I wonder if part of it is because I WANT to make them,for good reasons,not because I HAVE to.

So....no more bought treats. It's from scratch all the way!

Monday, December 21, 2009

H1N1 and Pork Pies

Yesterday was a fairly productive day. We went down to the H1N1 clinic at the high school to get our shots.When the clinic was first announced,it was for kids and those who had underlying health problems,so we were going to bring Zach. Then Friday they announced that in NH the shots were now open to the general public.So Rick and I decided to get the shots as well. We figured,since Zach was in school and he tends to bring home the flu every year,it couldn't hurt. We are not worried,just taking precaution.

The clinic opened at 9:00 AM,and we figured we would get there early in case it was busy. We were pleasantly surprised that we only had 6 people ahead of us. There was no line at the nasal immunization,so Zach got that and Rick and I had the shot. The gentleman who gave me the shot did a great job-I barely felt anything at all,and I complimented him on his expertise!

After we left the school,we filled the car up with gas (it was running low,and since the roads were getting slippery,I wanted the tank full to give the back more weight),then stopped at Cumberland Farms to grab some eggs. We then went home so I could start making my pork pies.

I grew up having pork pies each Christmas Eve. That was the only time of year we had them. My mother says that when she was young,her family went to Midnight Mass,and because you were not suppose to eat before Communion,they would eat their pork pies after church-at about 2:00 AM. Growing up,that was not a tradtion my mother passed on. We always went to 4:00 or 5:30 mass,and had our pork pies after.No Midnight mass for us.

Pork pies are a French tradition-and we are quite French. Both my father's and my mother's grandparents are from Canada,so I am a third generation American. ( I am also part Scottish,Irish,and Abenaki). If there is any mistake,my father's last name was Lessard,and my mother's was Charrette. Can't get more French than that.

This year I made three pork pies to give as gifts-one to our neighbors down the road,one to my father in law Dick and brother in law Spencer,and the third to my brother in law Dale and his practically like a brother roommate,Scottie. Last year Dale and Scottie stopped by on Christmas Eve,and preceeded to eat all my pork pie leftovers,so I figured this year I would make them a pie. My father in law has tried them and liked them,so he too, is getting one.

Pork pies are very easy to make. You need:
1 3/4 lbs ground pork
1/3 cup of onion
1/2 teaspoon ground cinnamon
1/2 teaspoon ground cloves
2-3 small- medium potatoes,mashed
salt and pepper to taste
double pie crust

Heat the oven to 350. Peel,then cube the potatoes and put them in boiling water until cooked.Mash and set aside ( DO NOT use milk or butter).Add salt.
Chop onion and cook in a small amount of butter until translucent.Add the pork,and when the pork is just about cooked,add the cinnamon and cloves. I don't measure any more, because I never use the amount in the recipe. It's all to taste. Add salt and pepper. Drain any fat,and add the meat mixture to the potoatoes. You might need to add more salt. Put the bottom crust into a 9 inch pie pan,and fill with pork pie mixture. Place the top crust on the meat mixture,then make slits in the top crust. Bake for about 30-40 minutes,until crust is cooked. You can make these ahead and freeze them as well.

We always serve our pies with peas,cranberry sauce,mixed pickles,and celery stuffed with cream cheese and olives. I have never deviated from this menu,and probably never will.

After I made the pork pies,I also made Dick a pecan pie (his favorite). Christmas Eve I will make our pork pies. Rick and Brian have gone down south ( North Hampton and Rochester) to deliver the pies and presents. I am staying here to start cleaning for holiday. I also need to wrap Zach's presents. Busy,busy busy!!!!!!